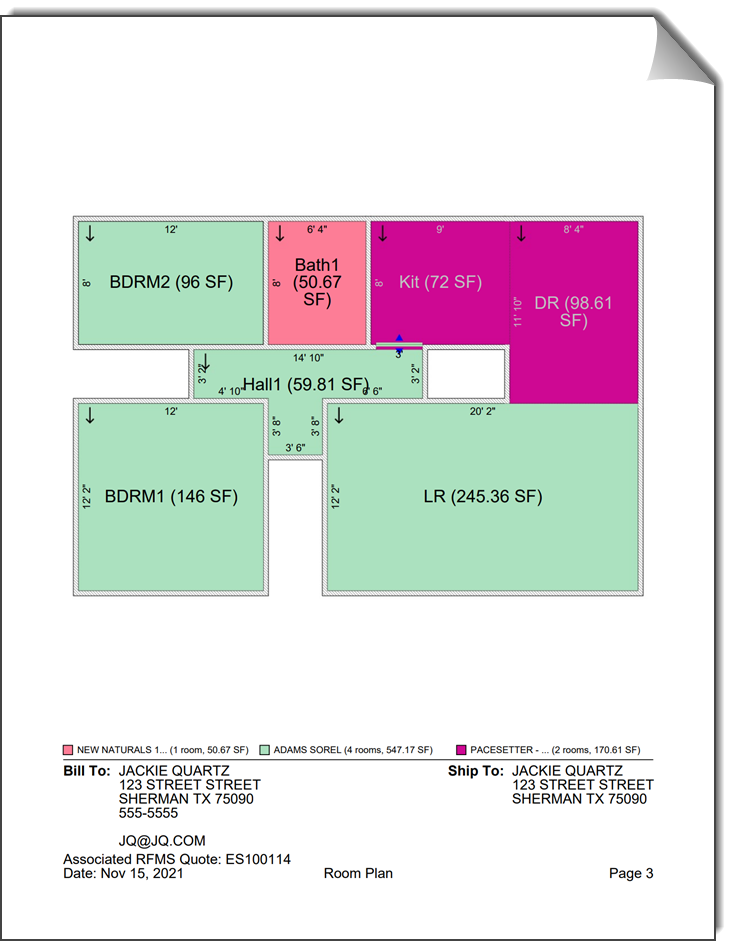
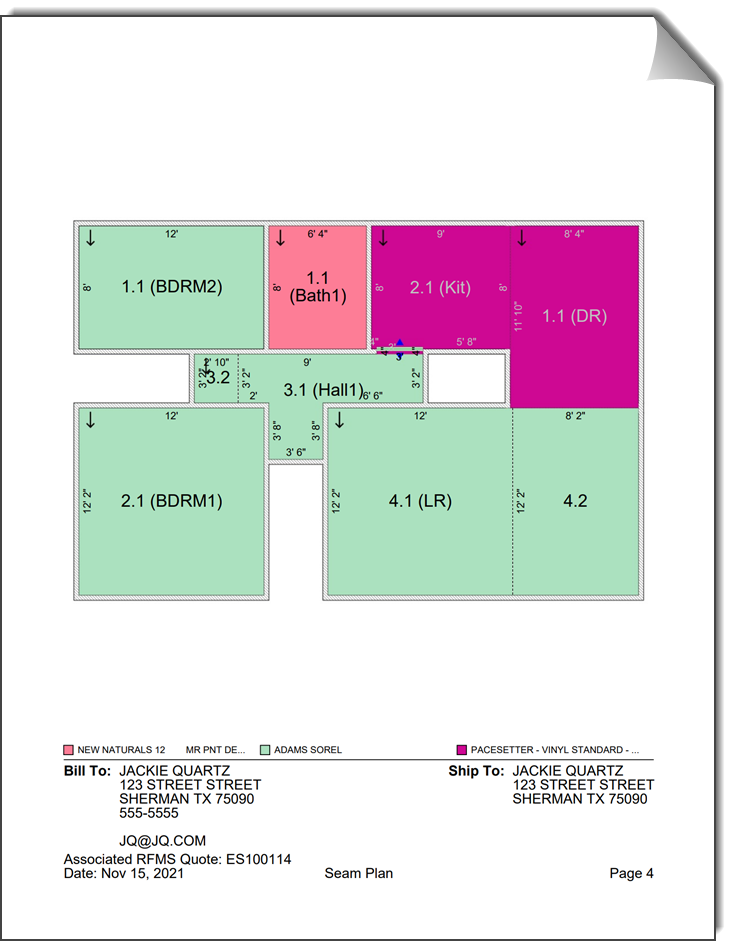
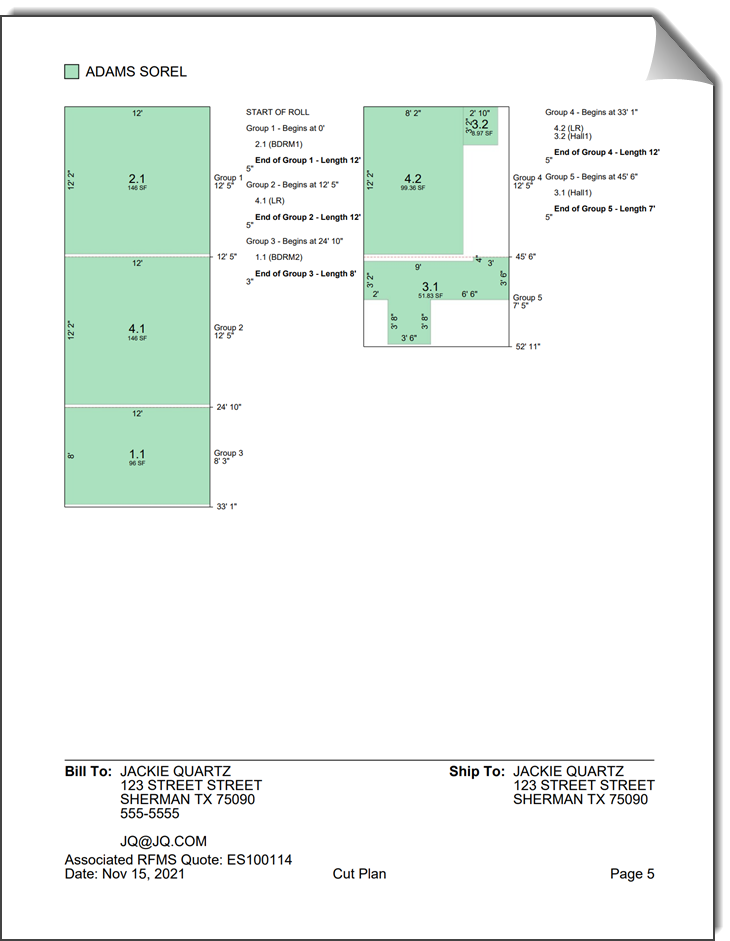
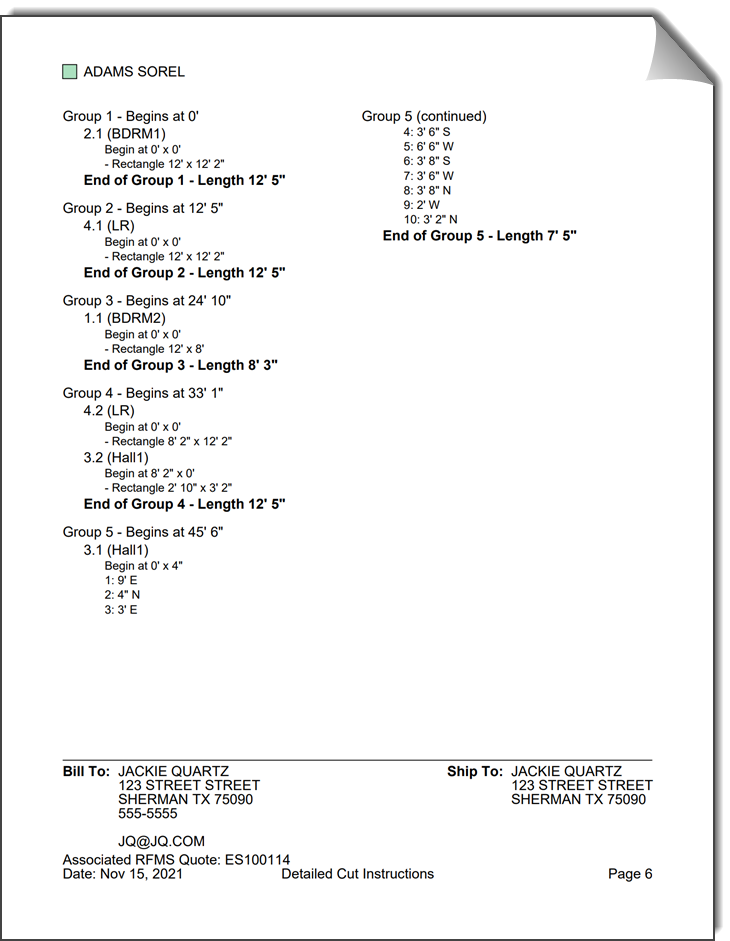
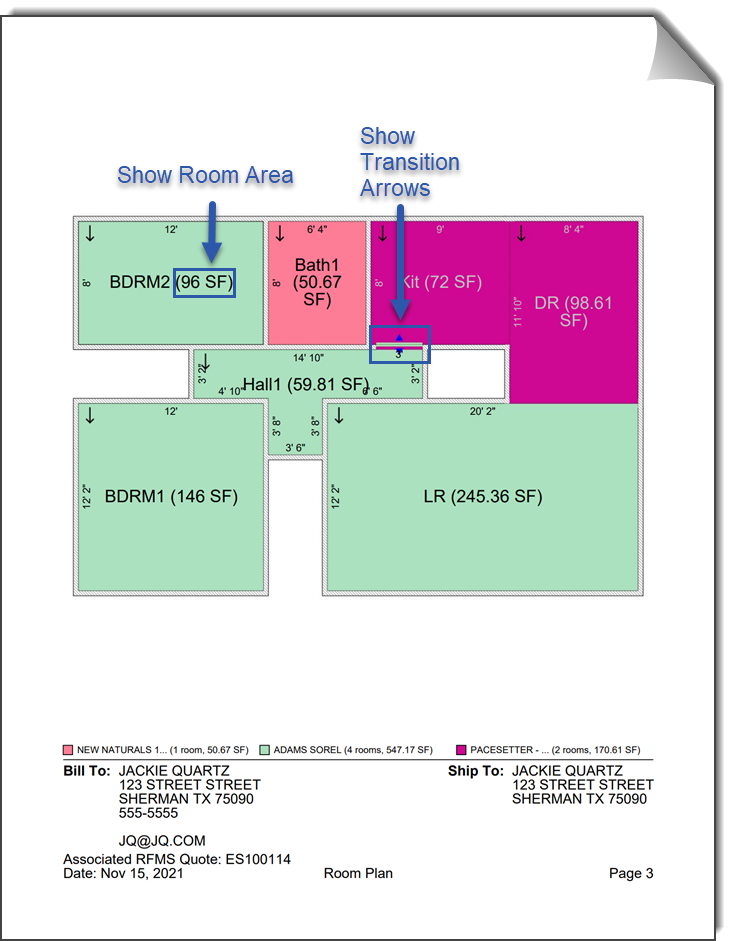
This article covers how to create and share the Installation Document used by your installers. This document consists of a Cover Page, a Room Plan, a Seam Plan, and a Cut Plan.
- The installation document is found under the Installation Screen
 in Measure Mobile.
 - To view the document after customizing it tap the PDF View button
 in the toolbar of the Installation screen.
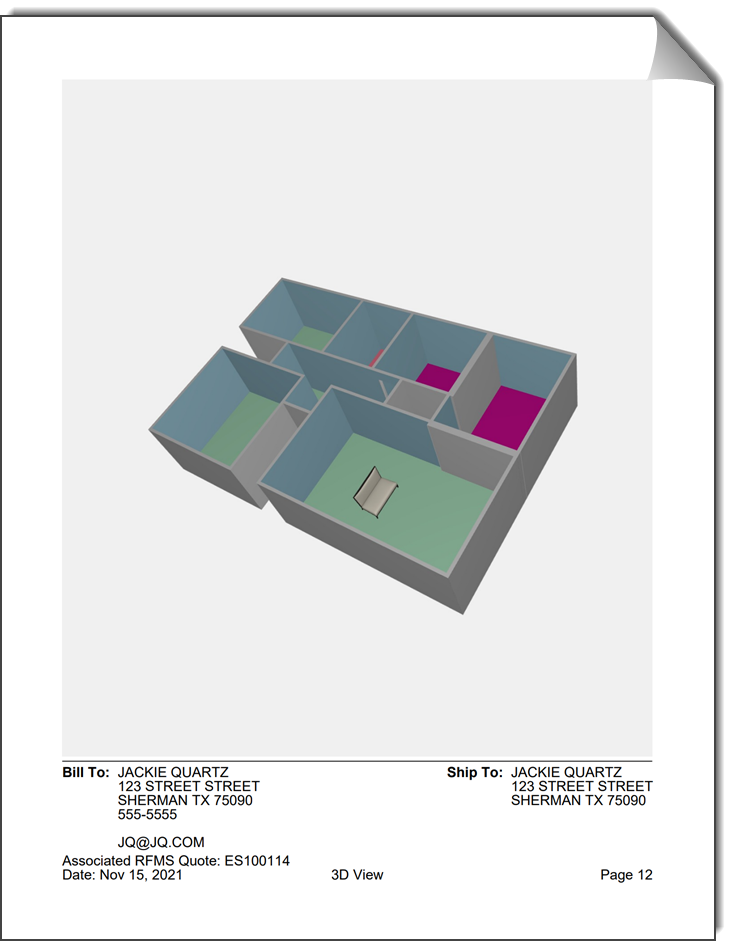
Cover Page Example
(Click to Expand)
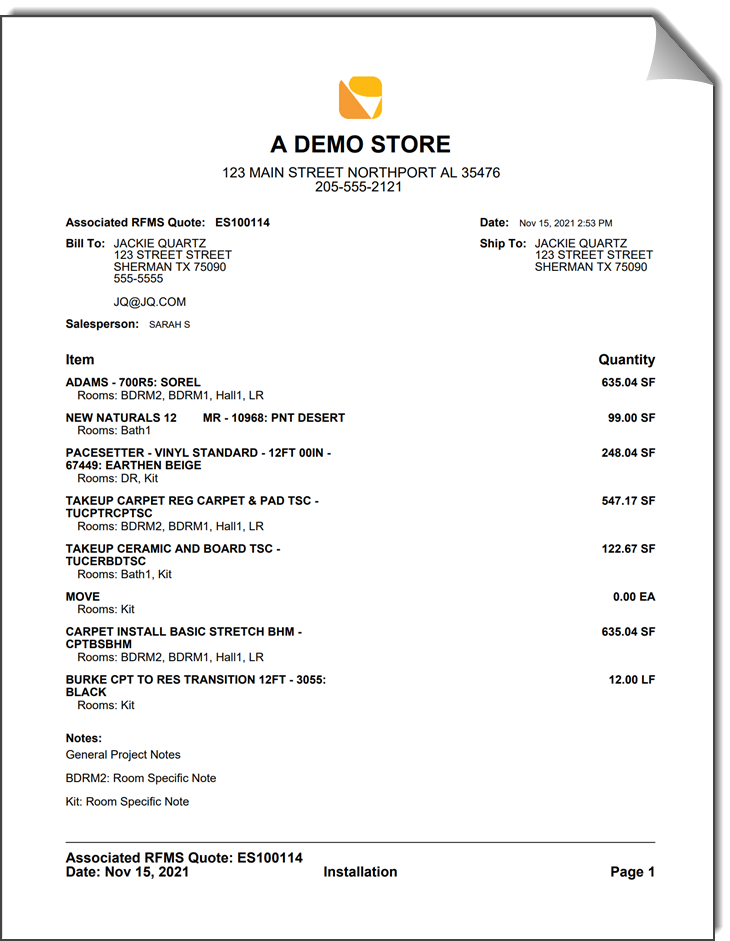
The cover page information includes:
- Logo, Company Name, Company Address: These are set within ROS under the My Company section.
- Date
- Quote/Order Number
- Salesperson Name
- Bill To/Ship To: These are set under Project Information
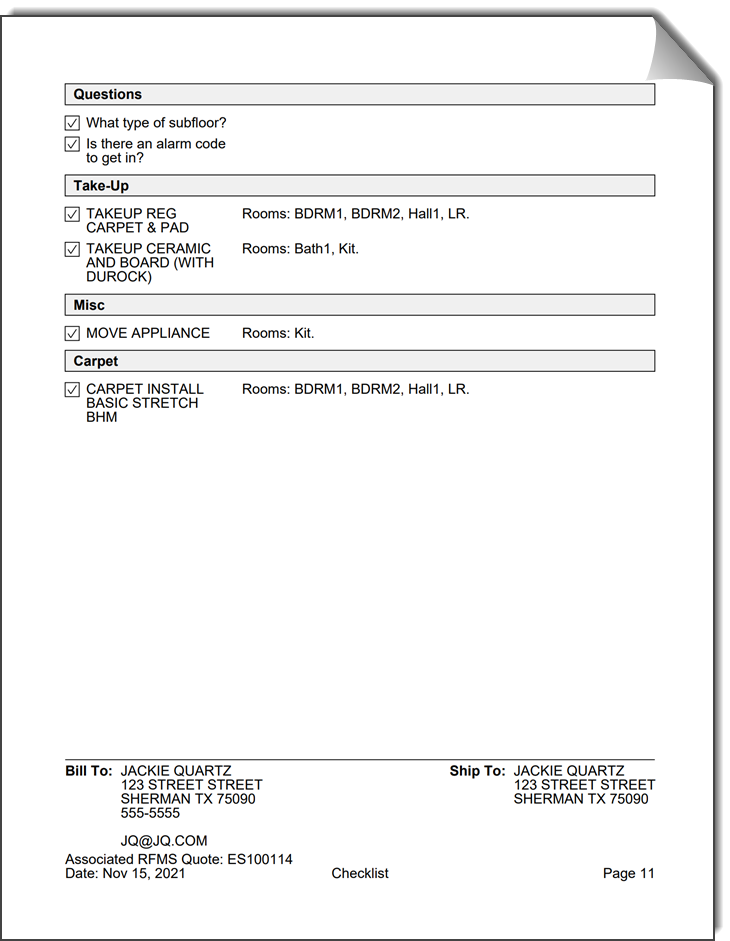
- Notes: These are general project notes and room notes. Line notes will not appear here. Checklist notes will appear on the checklist if included in the report. For more information see our Notes article.
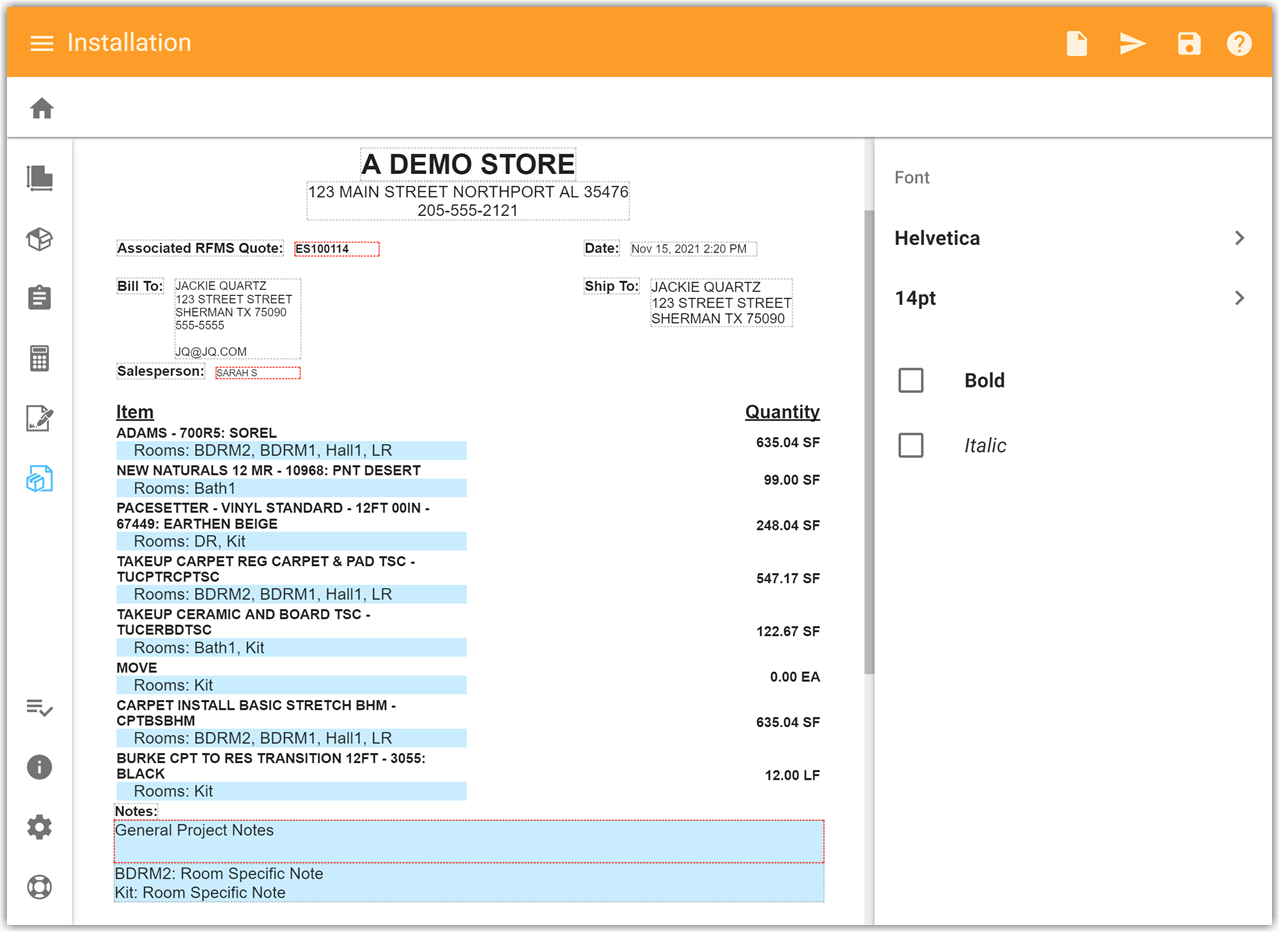
How To:
1. To format the information tap on an item. When it is highlighted in blue it is selected.
2. Use the right side section to adjust font style and text size. You can also change the position of items, such as the logo.
Customizing the Document
Tip: At the bottom of every page in the document Bill To/Ship To Information, Quote/Order Number and the Date will always be displayed.
- Paper Size:
- Choose a paper size. This effects all pages. Measure Mobile supports paper sized Letter, Legal, Ledger, A3, and A4. For other paper sized please use Measure Desktop.
- Layout:
- Choose either portrait or landscape page orientation. This effects all pages.
|
|
Click Image to Expand
Click Image to Expand
Click Image to Expand
|
|
|
|
|
|
|
|
|
|
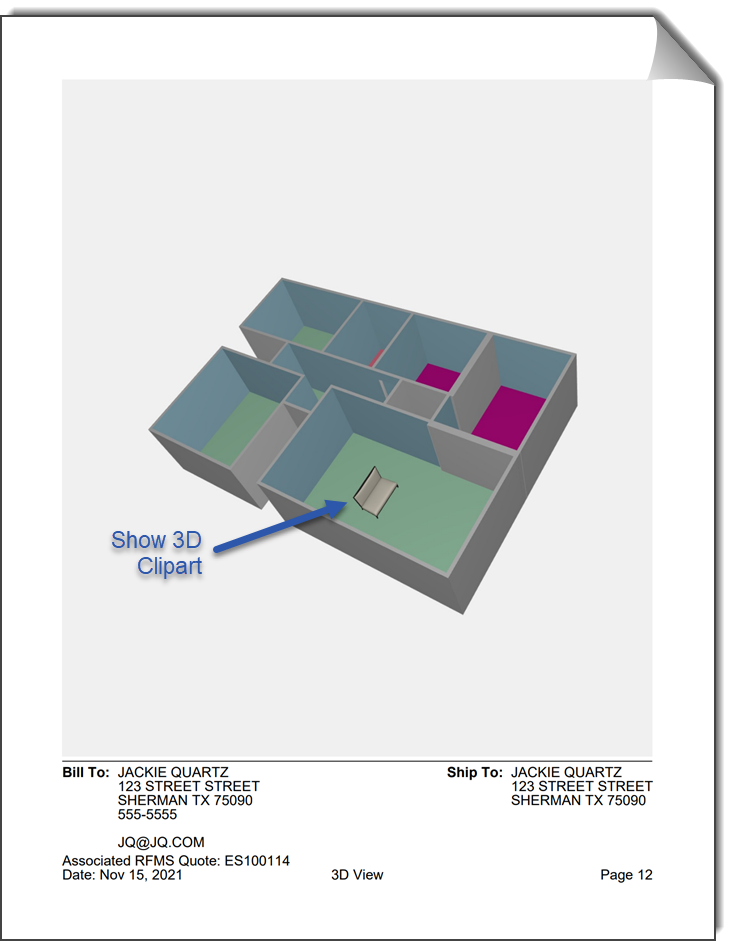
- Select Photos:
- Deselect photos from being included in the document
- Photo Layout:
- Choose the page layout of selected photos
- Photo Quality:
- Adjusting photo image quality will effect the size of the document. This setting is sticky.
For information about how to attach photos to a Measure project please see the article Measure Mobile Notes and Photo Attachments.
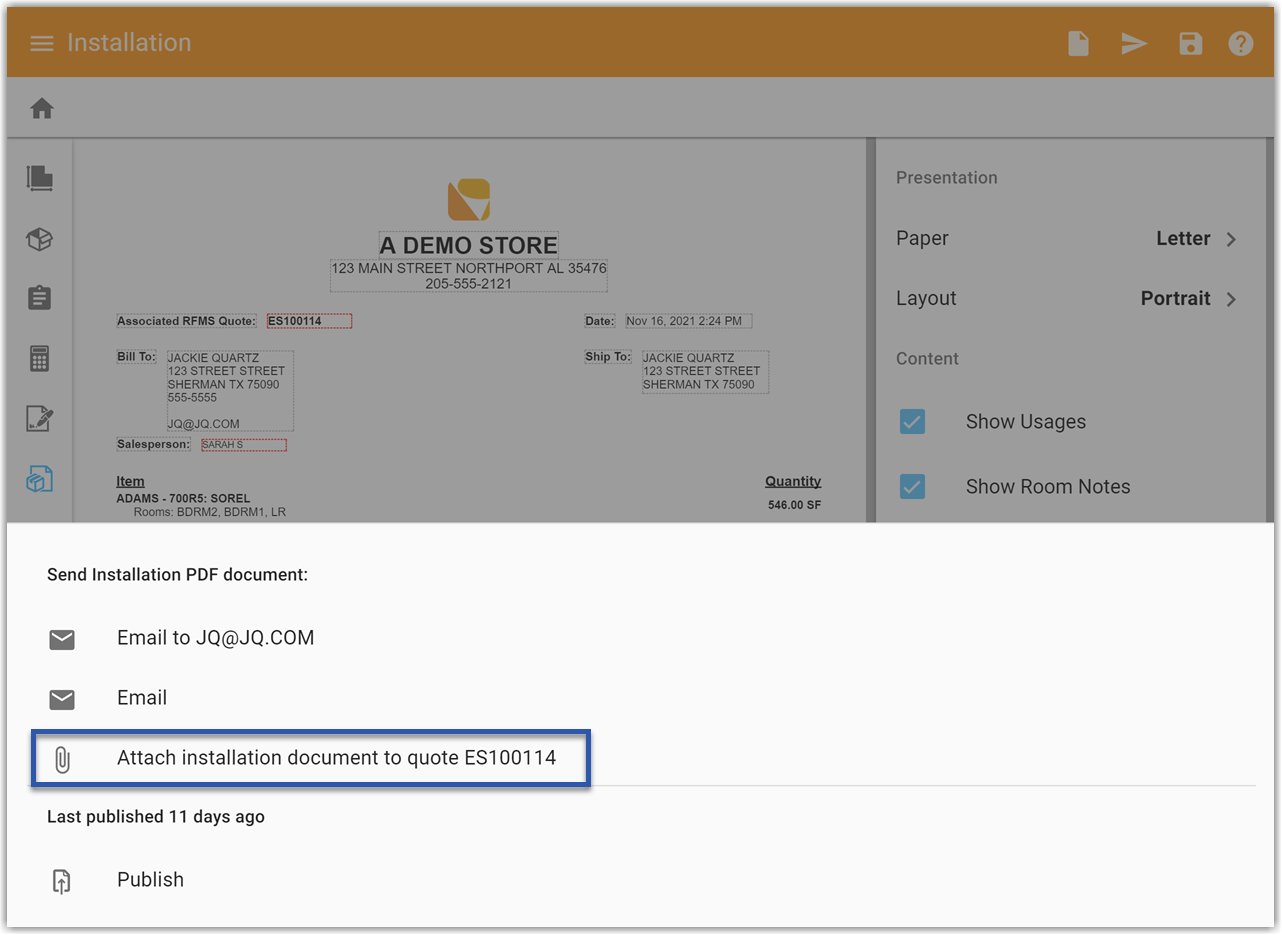
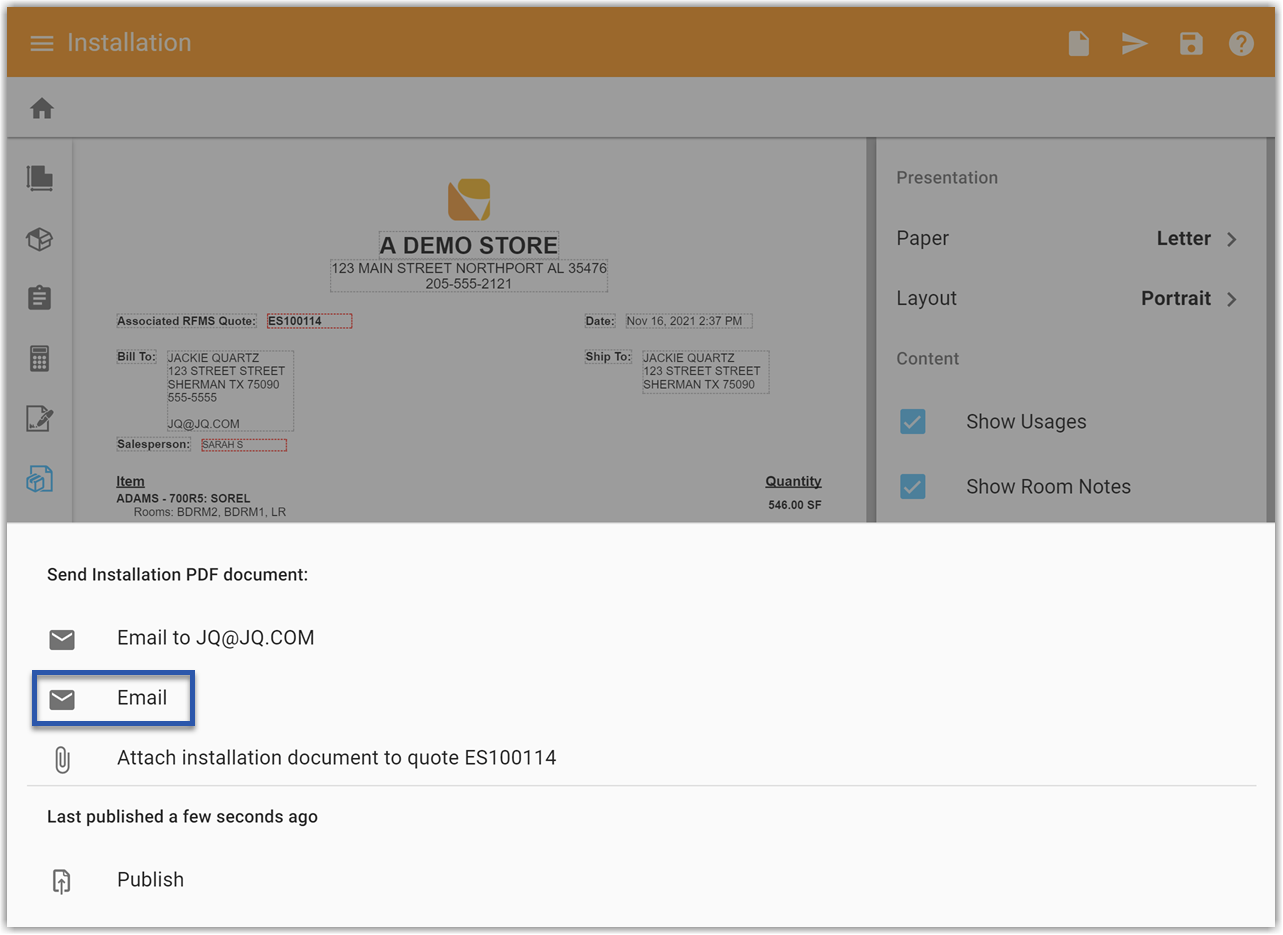
Sharing the Document
From the Customization/View Screen tap the Send icon ![]() , from the options that appear at the bottom of the screen select Attach installation document to...
, from the options that appear at the bottom of the screen select Attach installation document to...
From the Customization/View Screen tap the Send icon ![]() , from the options that appear at the bottom of the screen select Email. The default email app on your device will be opened.
, from the options that appear at the bottom of the screen select Email. The default email app on your device will be opened.
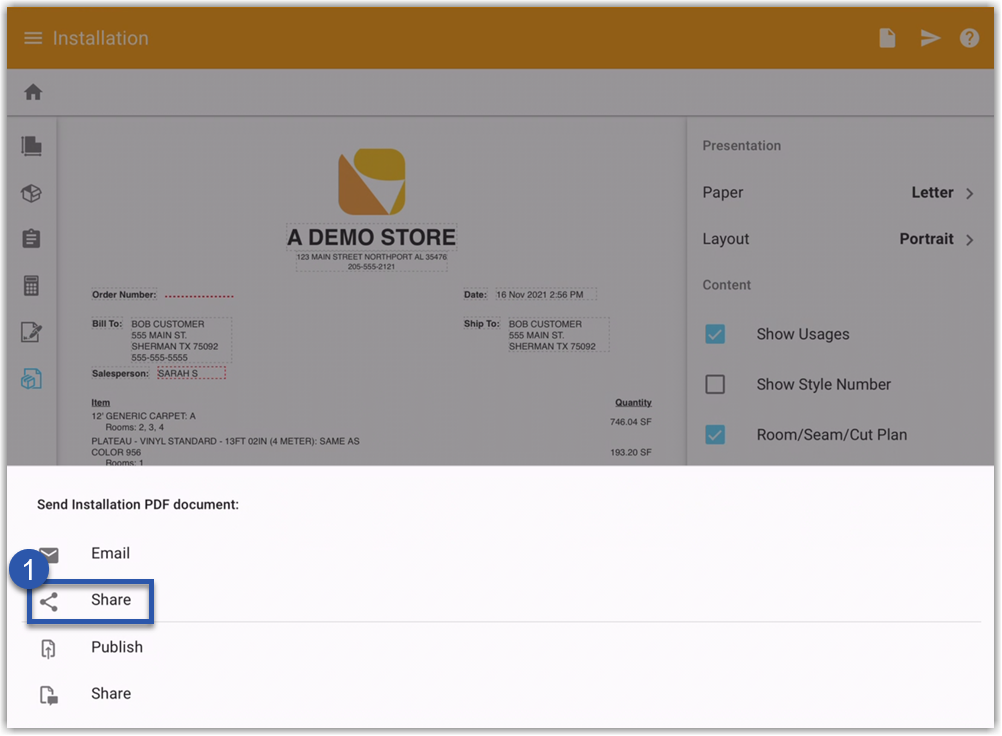
iOS
1. From the Customization/View Screen tap the Send icon ![]() , from the options that appear at the bottom of the screen select Share
, from the options that appear at the bottom of the screen select Share
2. Select Save to Files

Windows
1. From the Customization/View Screen tap the Save icon ![]()
2. Name and save the file from the Windows Save Menu that pops up.

iOS
1. From the Customization/View Screen tap the Send icon ![]() , from the options that appear at the bottom of the screen select Share
, from the options that appear at the bottom of the screen select Share
2. Select Print from the options 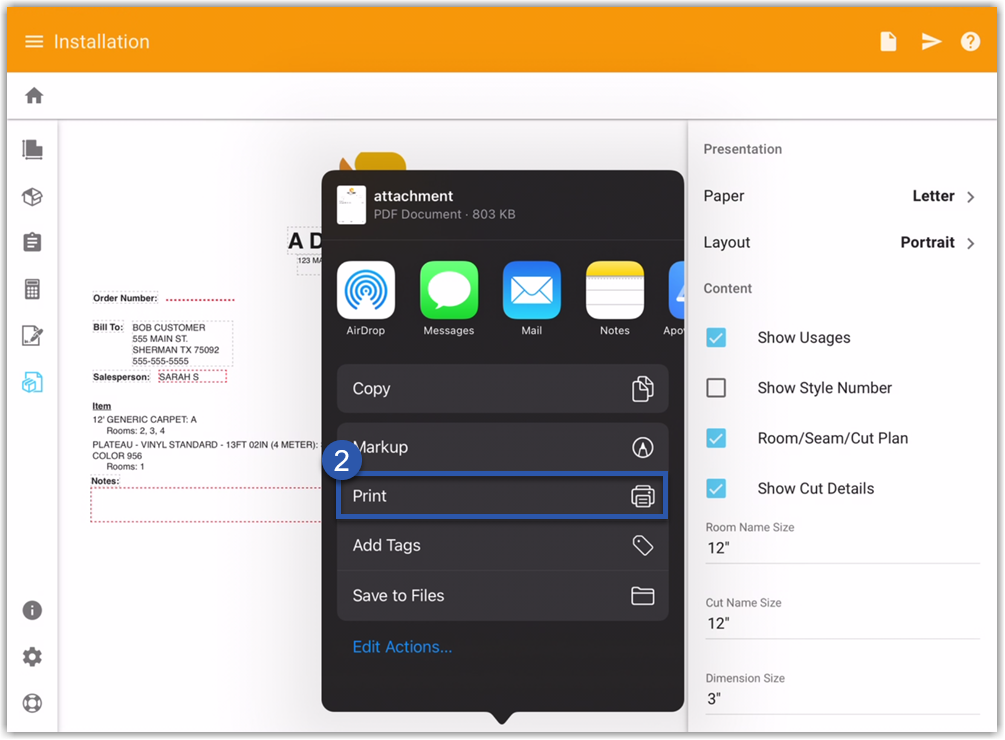
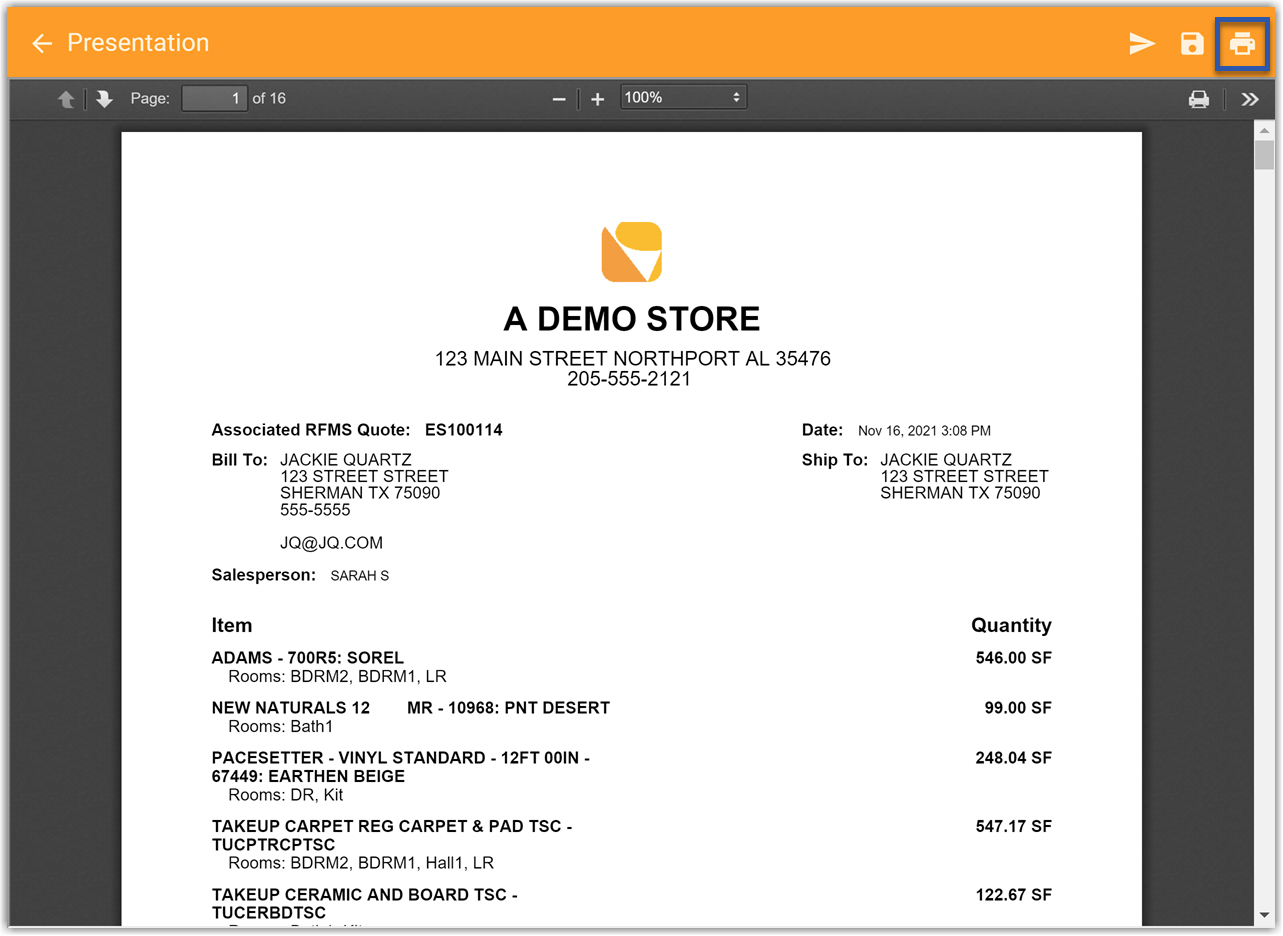
Windows
1. Tap the PDF View button ![]() in the toolbar of the Installation screen.
in the toolbar of the Installation screen.
2. From the View Screen tap the print button ![]()
Comments
Article is closed for comments.