The Quick Tile library can be accessed through the ribbon bar or by using the Palette. Pull from a library of predefined patterns and insert into any room regardless of size or shape.


Video Tutorial
Quick Tile Library
Note:
If your company uses RFMS Cloud Storage, you may choose to share and import patterns within your company. If you do not use this feature, then your Quick Tile library will contain only your designs.
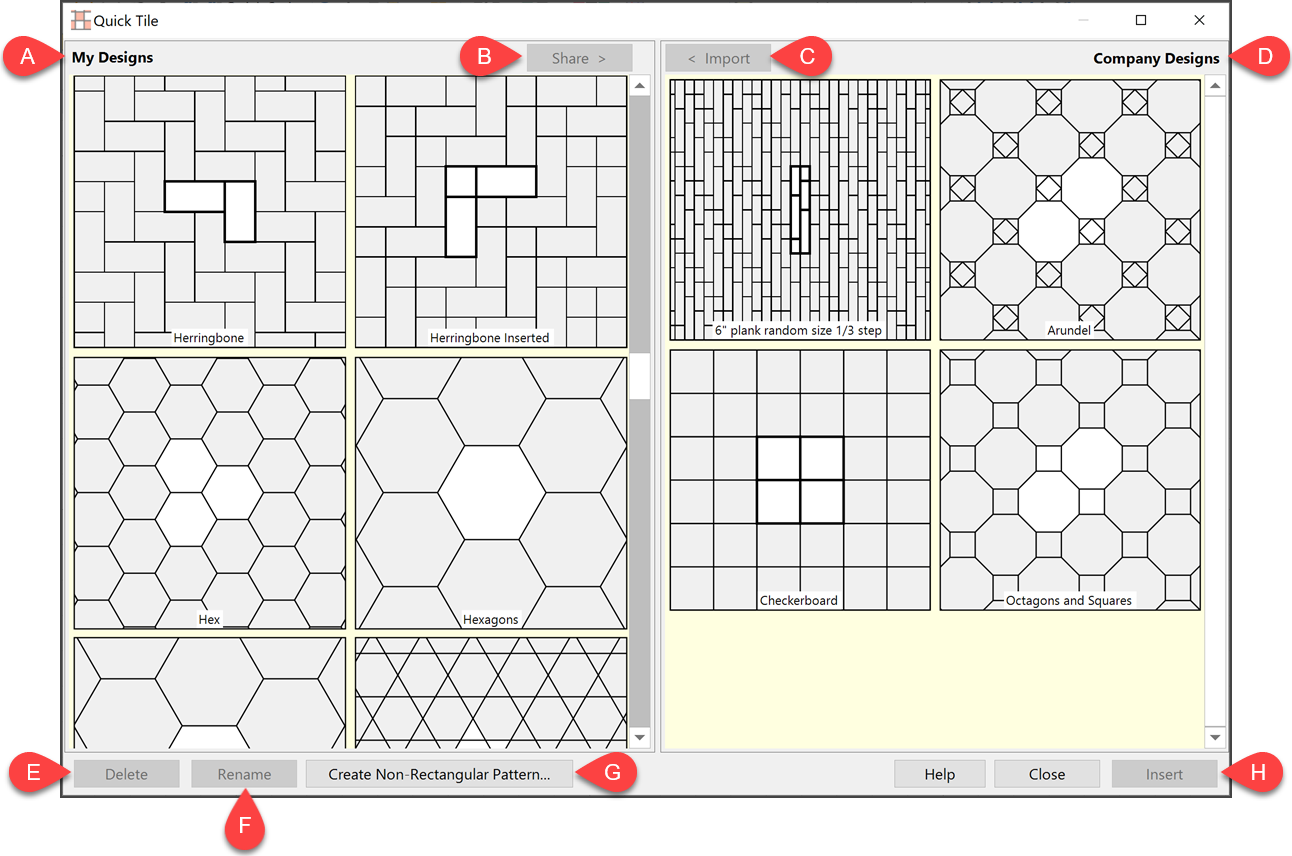
- A. My Designs
- Library of patterns that have been saved to the local workstation. Left-click to make a selection.
- B. Share
- Upload a tile pattern from your local library to the RFMS Cloud. Patterns that have been shared to the Cloud are accessible to all users in your company.
- To Share to the Cloud: Select a pattern from the My Designs section then click the Share button.
- C. Import
- Import the selected pattern from the RFMS Cloud to the local "Quick Tile" library.
- To Import from the Cloud: Select a pattern from the Company Designs section and then click the Import button.
- D. Company Designs
- Library of patterns that have been saved to the company's RFMS Cloud. Left-click to make a selection. Any changes made to stacks in this library will affect all other users in your company.
- E. Delete
- Delete selected pattern.
- F. Rename
- Edit the name of selected stack
- G. Create Non-Rectangular Pattern...
- Opens Custom Tile creator.
- H. Insert
- Insert selected pattern into selected room(s) in drawing area.
Add a Quick Tile Pattern to a Room
Drag and drop patterns into a room(s) from the palette or from the Quick Tile Library

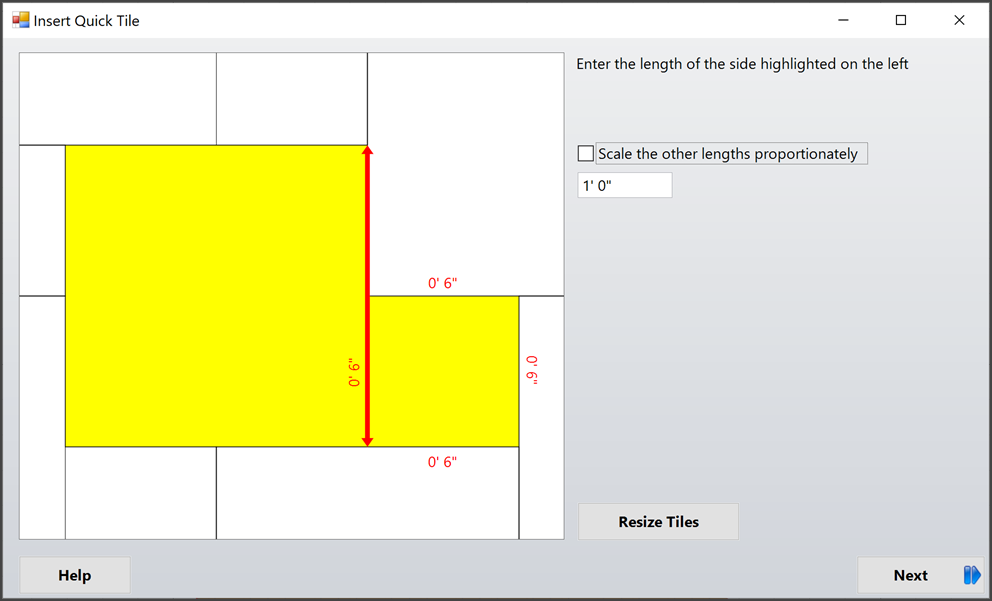
After droppihng or inserting a pattern into a room you will be presented with the Insert Quick Tile Wizard. Select the button for Resize Tile to access the Insert Quick Tile Window.
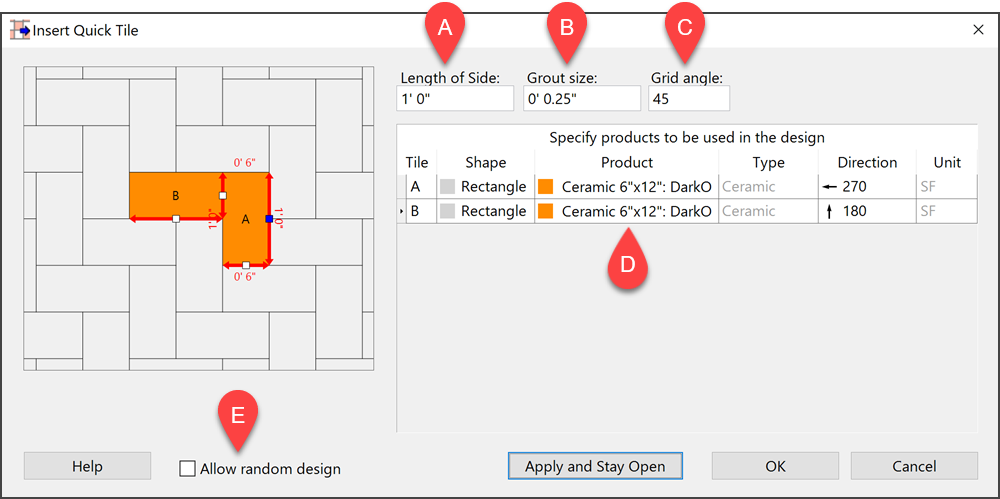
- A. Length of Side
- Select a tile side from the pattern preview window. Enter the desired length is this box.
- B. Grout Size
- Enter the grout width in this box. If grout is applied as an add-on product it will be calculated based on this.
- C. Grid Angle
- Indicate the pattern lay direction in degrees.
- D. Product
- Select from existing products in your product list or allow Measure to create a new product based on the pattern.
- E. Allow Random Design
- When this box is checked it allows you to set a percentage that controls how often a tile product will be used in the pattern.

-
a. Use the "plus" and "x" buttons to add or remove lines. The use percentage of each tile can be manually edited. Regardless of how many lines are added for any given pattern segment they must add up to 100 percent.
b. Use the drop-down box to choose whether there is any required spacing between colors in the pattern.
After droppihng or inserting a pattern into a room you will be presented with the Insert Quick Tile Wizard. Follow the step by step guideing to place the pattern and products into the room. Select the button for Resize Tile to access the Insert Quick Tile Window.
Comments
Please sign in to leave a comment.