
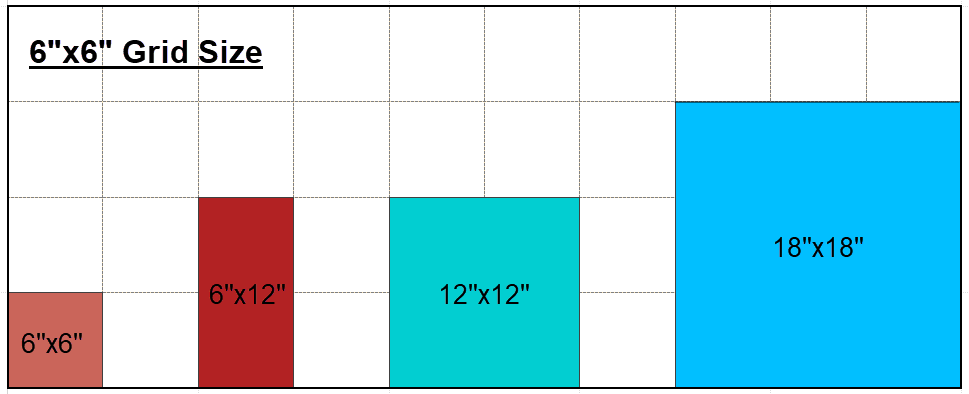
A layer consists of a grid into which tiles can be drawn. Each layer can have its own grout width, angle, and grout product. Only tiles that are compatible with the grid size of a particular layer can be drawn on that layer.
Example:
Note: Only square and rectangular tiles can be added through the tile editor. For non-rectangular tiles use the Custom Patterns or Quick Tile features.
Layers are made automatically when a Quick Tile pattern is used. They can also be created manually using the Manage Layers tool in the Tile Editor.
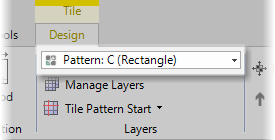
Select Tile Layer:
|
Use this drop down box to select which layer you would like to work on. |
|
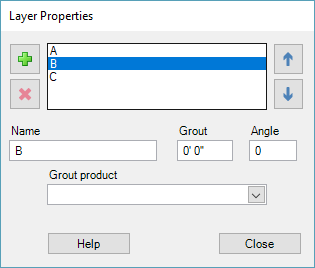
Manage Layers:
| Use this tool to edit existing layer properties or to add new layers manually. |  |
|
Select the layer by clicking on the name so that it is highlighted in blue. Use the "plus" and "x" buttons to add a layer or delete a selected layer. Use the up or down arrow to move a selected layer's list position. Each layer can have its own name, grout, angle, and grout product. |
 |
|
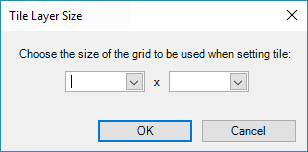
When creating a new layer you will be prompted to define the grid size. Newly created layers will not contain any tile. |
 |
Tile Pattern Start:
 |
Relative to room: Choose a point within the room to use as the pattern start. When the room moves, the pattern remains unchanged within the room. |
 |
Center tile: Centers the tile size within the room. |
 |
Center grout line: Centers the grout crossover in the room. |
Comments
Please sign in to leave a comment.