This feature allows auxiliary products and services to be added to projects on a per-room basis. Add-On items are calculated based on user-defined rules and added to the takeoff.

Room Add-Ons are best used in situations where multiple rooms that utilize the same primary flooring product are to receive different auxiliary products or services. Example: A number of rooms in a project are assigned the same tile product, but they won't all share the same covebase. Room Add-Ons allow for this variation.
Video Tutorial
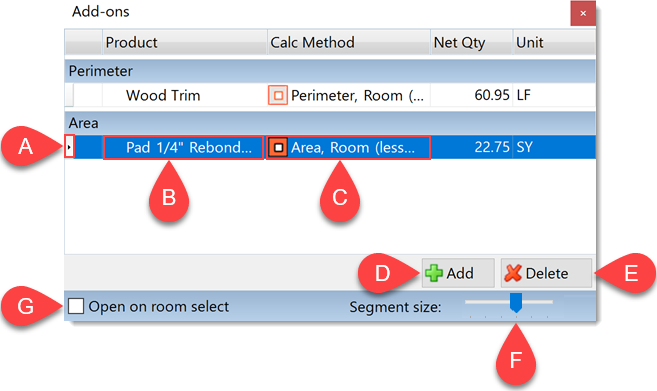
The Room Add-on Window
|
A. Select |
|
B. Product |
|
C. Calculation Method |
|
D. Add |
|
E. Delete |
|
F. Segment Size |
|
G. Open on Room Select |
How To:
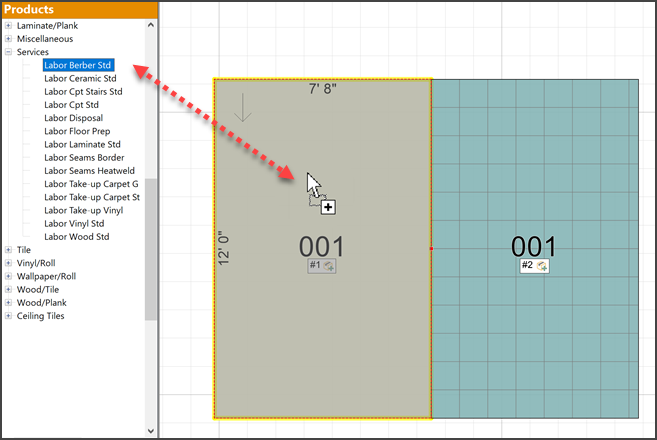
Auxiliary products and services can be added to rooms or materials areas via the Palette in the drawing screen.
1. Select the room or material area
2. Navigate to the desired product in the Palette
3. Drag and drop the product over the selected area
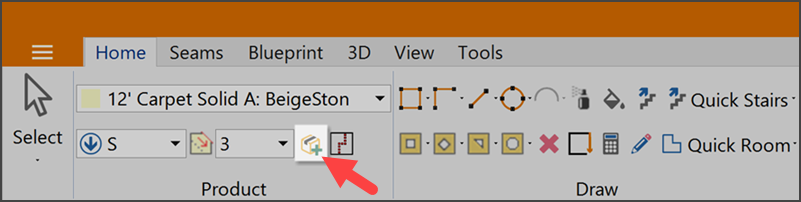
1. Select the room(s) to which the Add-On should be applied, either on the drawing itself or by selecting a room line in the Worksheet. If accessing Room Add-Ons from the Worksheet, only a single room may be selected.
2. For rooms selected directly on the drawing, click the Add-On button under the Home tab of the Ribbon Bar. A new window will appear.
If Room Add-Ons are to be accessed from the Worksheet, click the Add-Ons for Room button in the lower-left corner of the screen.
3. Click the Add/New button.
4. Left-click a product or service to select it and click OK.
Tip:
Hold down the Ctrl key and left-click to select multiple items. Doing so allows you to attach more than one Add-On at a time.
5. Most items will default to a specific calculation method. It can be changed by clicking the Calculation Method drop-down box next to the item.
See: Basic Calculation Methods and Advanced Calculation Methods
6. If additional Room Add-Ons are to be created, repeat steps 3-5.
7. Close the Add-On window or move it out of the way to continue working on the project.
Select the room, then select the Material Area to which the Add-On should be applied, either on the drawing itself or by selecting a material line under the room the Worksheet.
The remaining process is the same as the above.
When choosing a calculation method for a perimeter-based Add-On, there are options to exclude it from transitions, edges, and/or holes. In some cases it may be necessary to indicate specific room sides to which the Add-On should not be applied. The following steps show how this may be done:
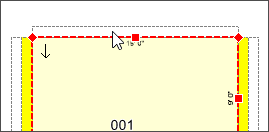
1. Select the room or material area to which the perimeter Add-On is to be applied.
2. Open the Room Add-On window if it does not open automatically. Do this from the Drawing screen by clicking the "Add-On" button on the Ribbon Bar. If the Worksheet is currently open, click the "Add-Ons for Room" button in the lower-left corner of the screen.
3. Select the highlighted segment on the side of the room where the Add-On should be excluded by left-clicking it. If multiple perimeter Add-Ons are in use, there will be a highlighted segments for each one. The product in use on the currently-selected segment will be highlighted in the Add-On window.
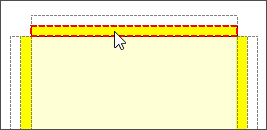
4. Left-click the segment a second time to remove it. The Add-On will no longer be calculated along that side of the room.
Comments
Please sign in to leave a comment.