Seams on rooms with roll products will appear as dashed lines. This article will focus on how to view and edit seams for roll products.
To view seams:
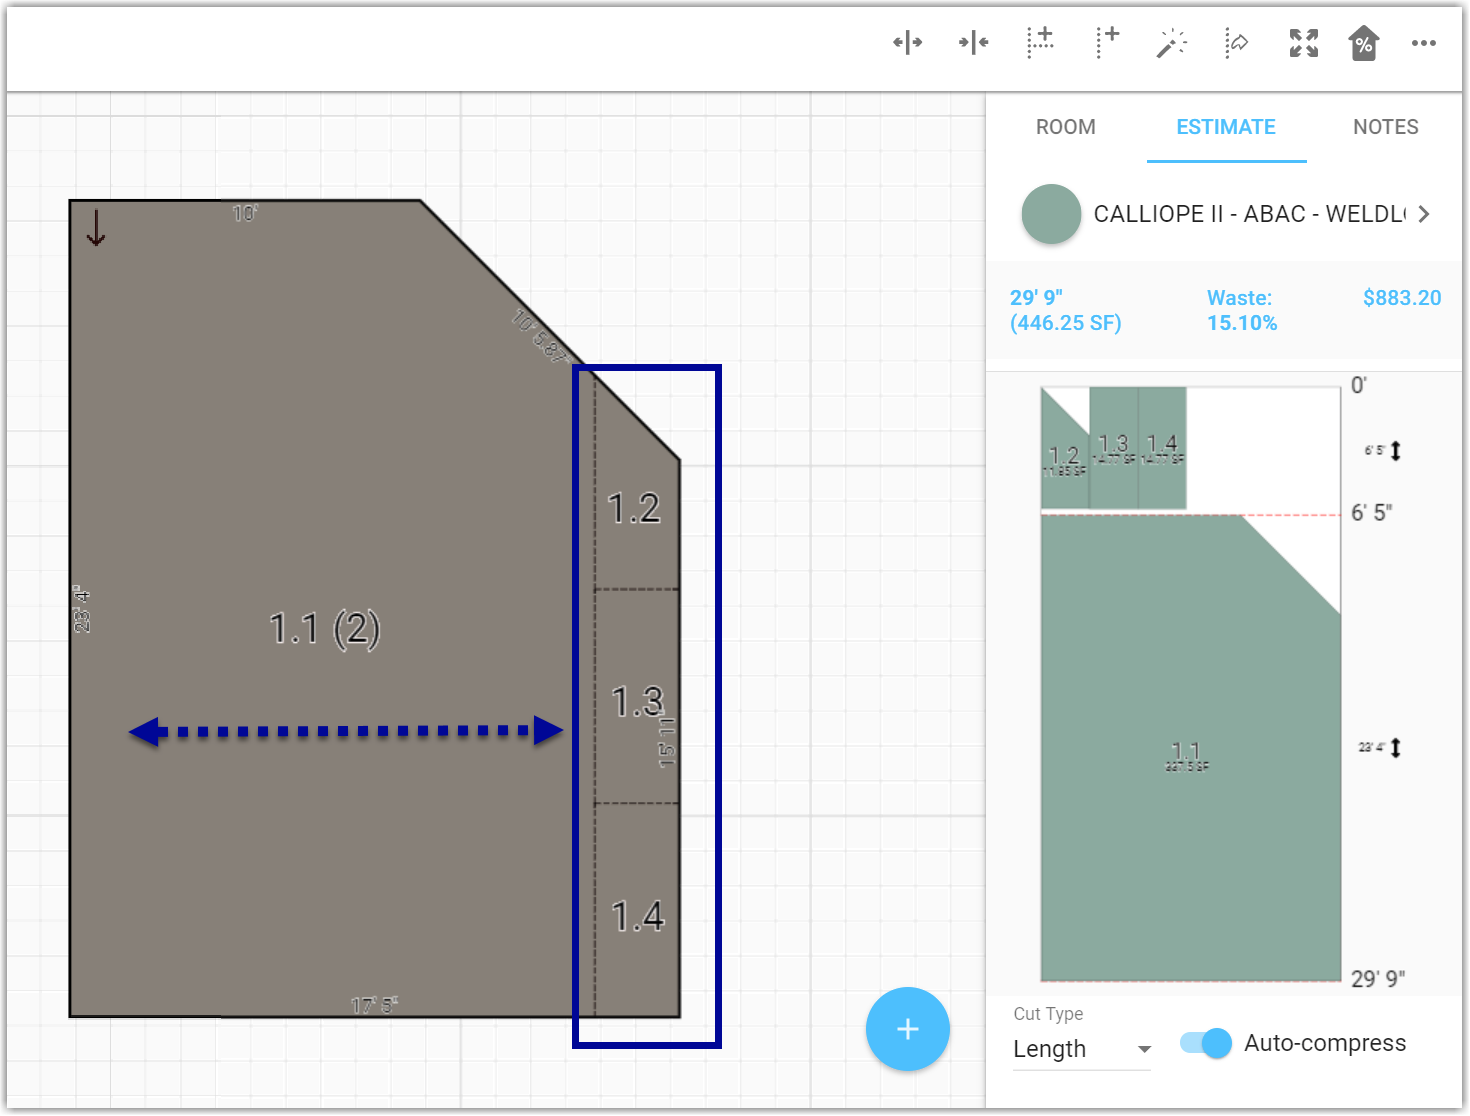
- From the
 Drawing Screen select a room with a roll product.
 - Next, switch to the Estimate tab in the right side section.
- Use seam tools in the Toolbar to add and edit seams.
Video Tutorial
Viewing Seams (Click to enlarge.)

Tips:
- Total length, area, as well as waste percentage will appear below the style and color.
- Waste is visually displayed by the white area surrounding cuts.
- After each change made the roll plan will reallocate automatically.
Tools for Adding and Editing Seams
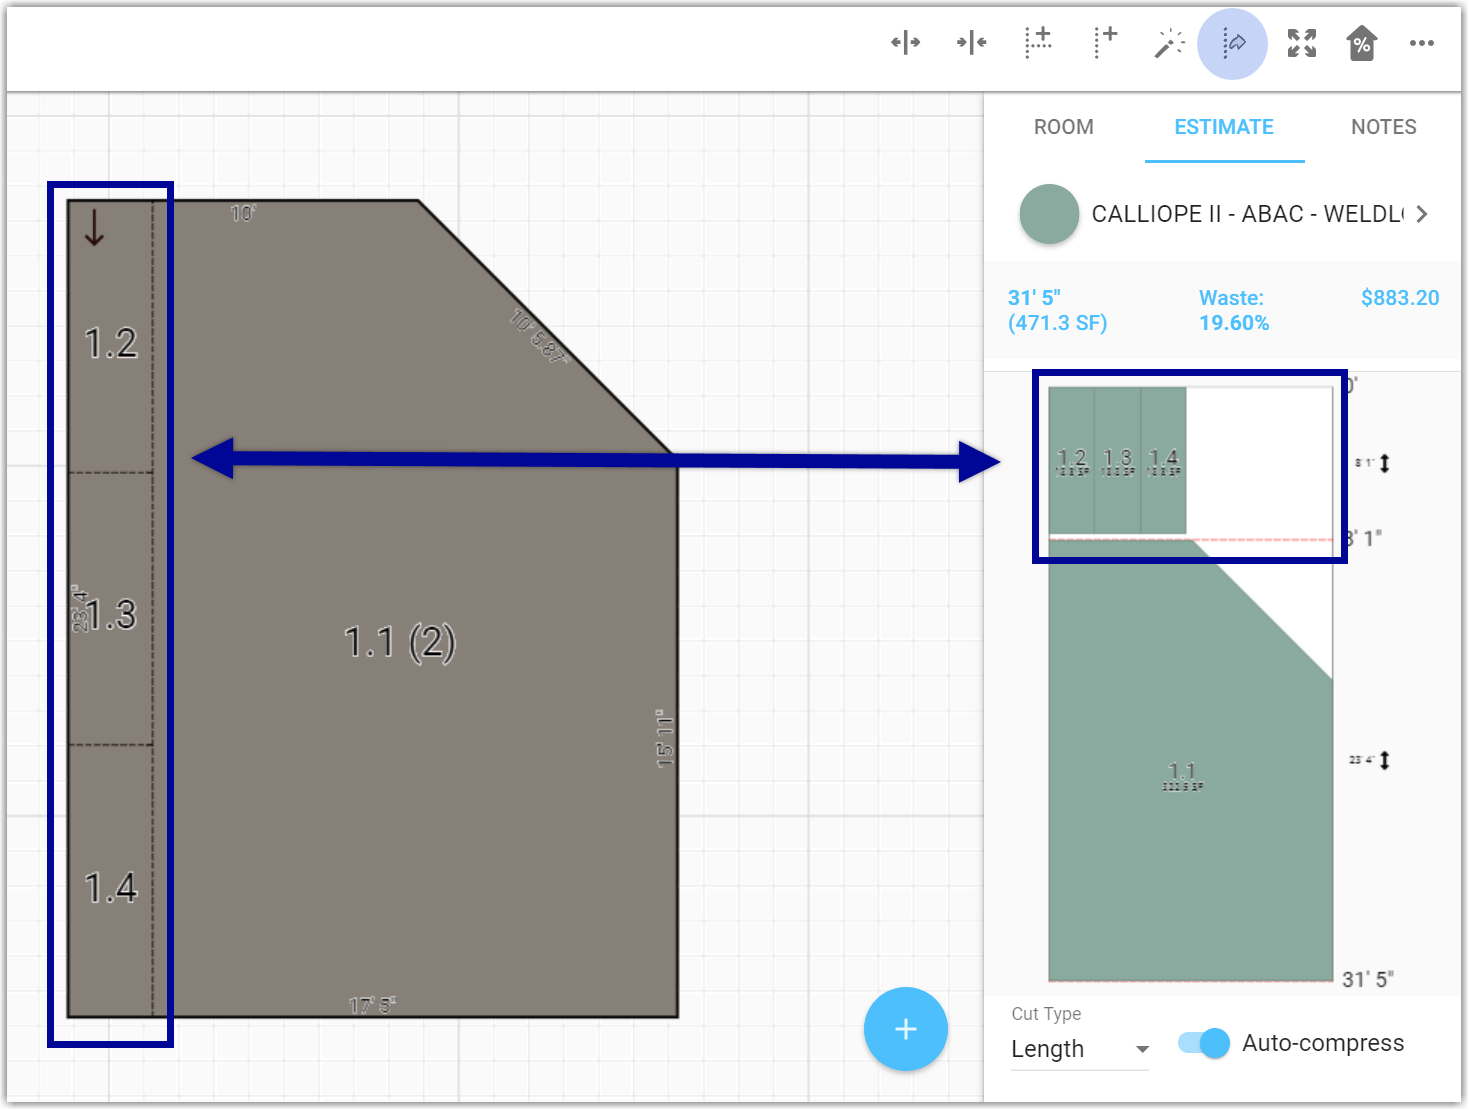
Select room, then select the Flip Seam tool. This will flip the seams to the opposite side of the room.
| Before |
|---|
 |
| After |
 |
Select the Insert Length Seam tool, then tap on a location in the room to place it.
Tip: Tap and hold to bring up guideline measurements. Slide to position and release to place.
Note: The length seam will follow the current lay direction.
Select the Insert T Seam tool, then tap on a location in a room to place it.
Tip: Tap and hold to bring up guideline measurements. Slide to position and release to place.
Note: The seam will be placed crosswise to to the current lay direction.
Select room, select cut, tap a seam handle, then slide the seam handle using the dimensions that appear as your guide.
Select room, select cut, select seam handle, press the Delete Seam tool.
Note: Any seams laid crosswise to the deleted seam will be deleted also.
| This tool will only be available if Auto-compress is turned off. |
The Manual Compress tool will compress your cuts, attempting to lower overall waste, without changing their order.
| Before | After |
|---|---|
Recalculate and optimize cut placement and order.
Note: If you have made any custom cut placements these may be lost when this action is performed.
Reverts back to the original allocation. To use, select room(s), then press the magic wand tool.
Apply extra waste using this tool. Calculate it by percentage, SY, or Length.
- Before seams on a stairway can be edited, Expanded View must be selected. This shows the material for risers and tread.
- Switch to the Estimate tab and select a cut along the stairway that you want to edit. Use the handle to slide the seam.
Comments
Please sign in to leave a comment.