Default walls are an optional visual aid for 2D and 3D representations of the floorplan. Wall height, thickness, and color are all customizable.
Video Tutorial
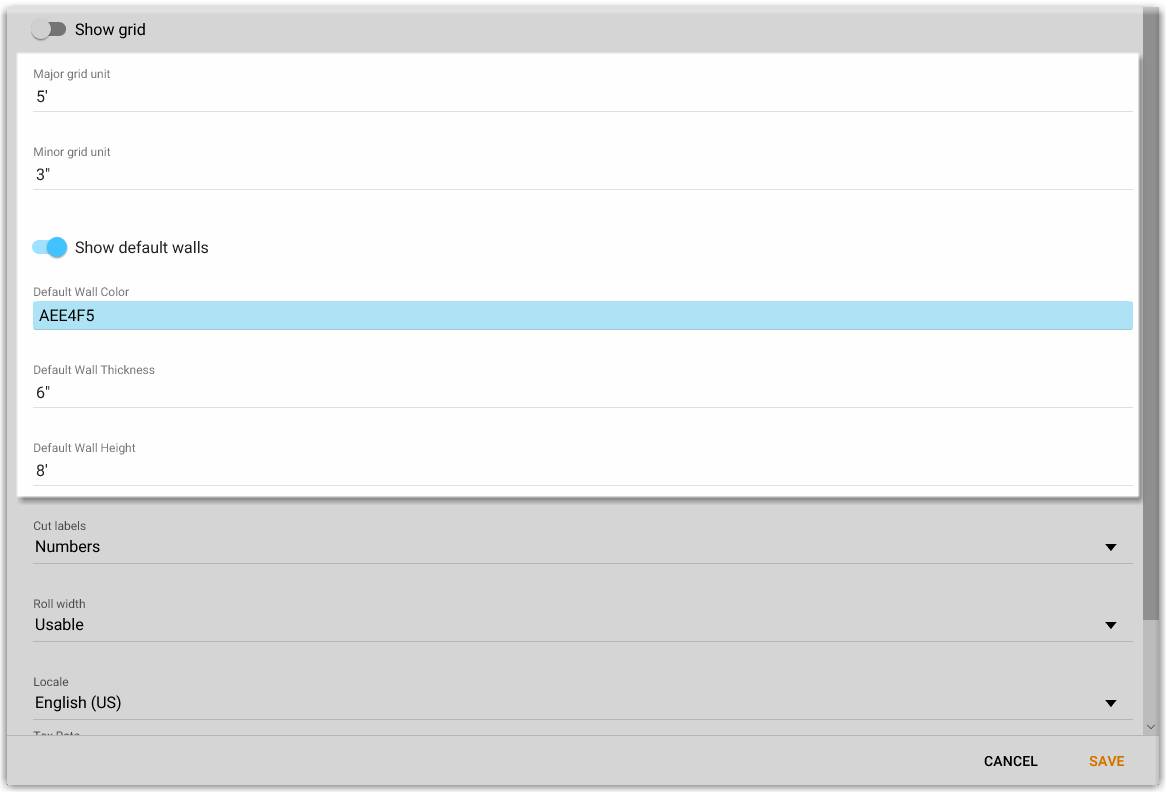
How to Enable the Default Walls Feature
- Go to your Project Settings. This can be found by opening the left sidebar menu and tapping the settings icon,
 located at the bottom right.
 - Midway down the Project Settings window is a toggle for Show Default Walls. Switch the toggle to the right so that it is highlighted in blue.
- Set the wall color using the color selector. If no color is chosen the walls will be shown as grey.
- Define wall thickness and height.
- Tap Save to lock in these settings. (These settings will be applied to all future projects. For more information please see the article Project Settings.)
Show or Hide Wall Segments
You can turn individual wall segments on or off by selecting a side and then pressing the display wall toggle icon.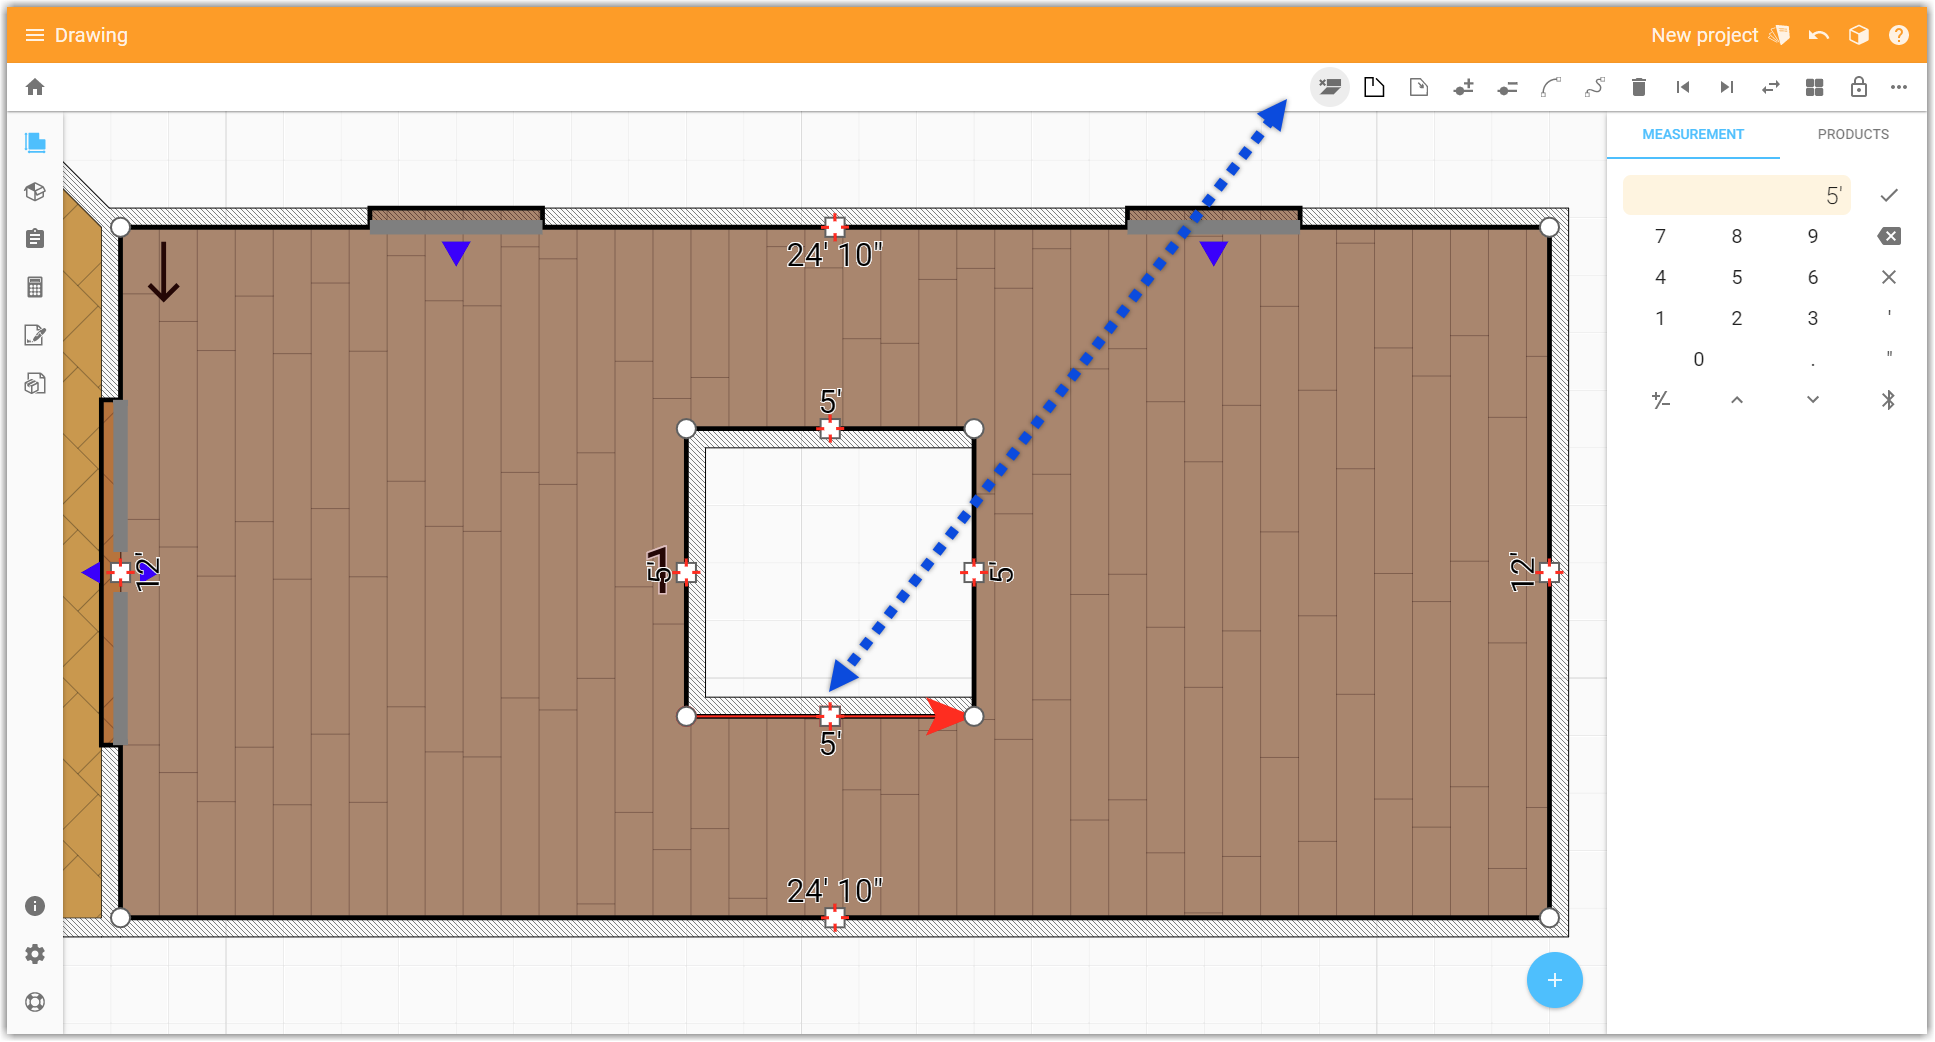
The 3D Viewer
- Select the
 icon to open the 3D viewer.
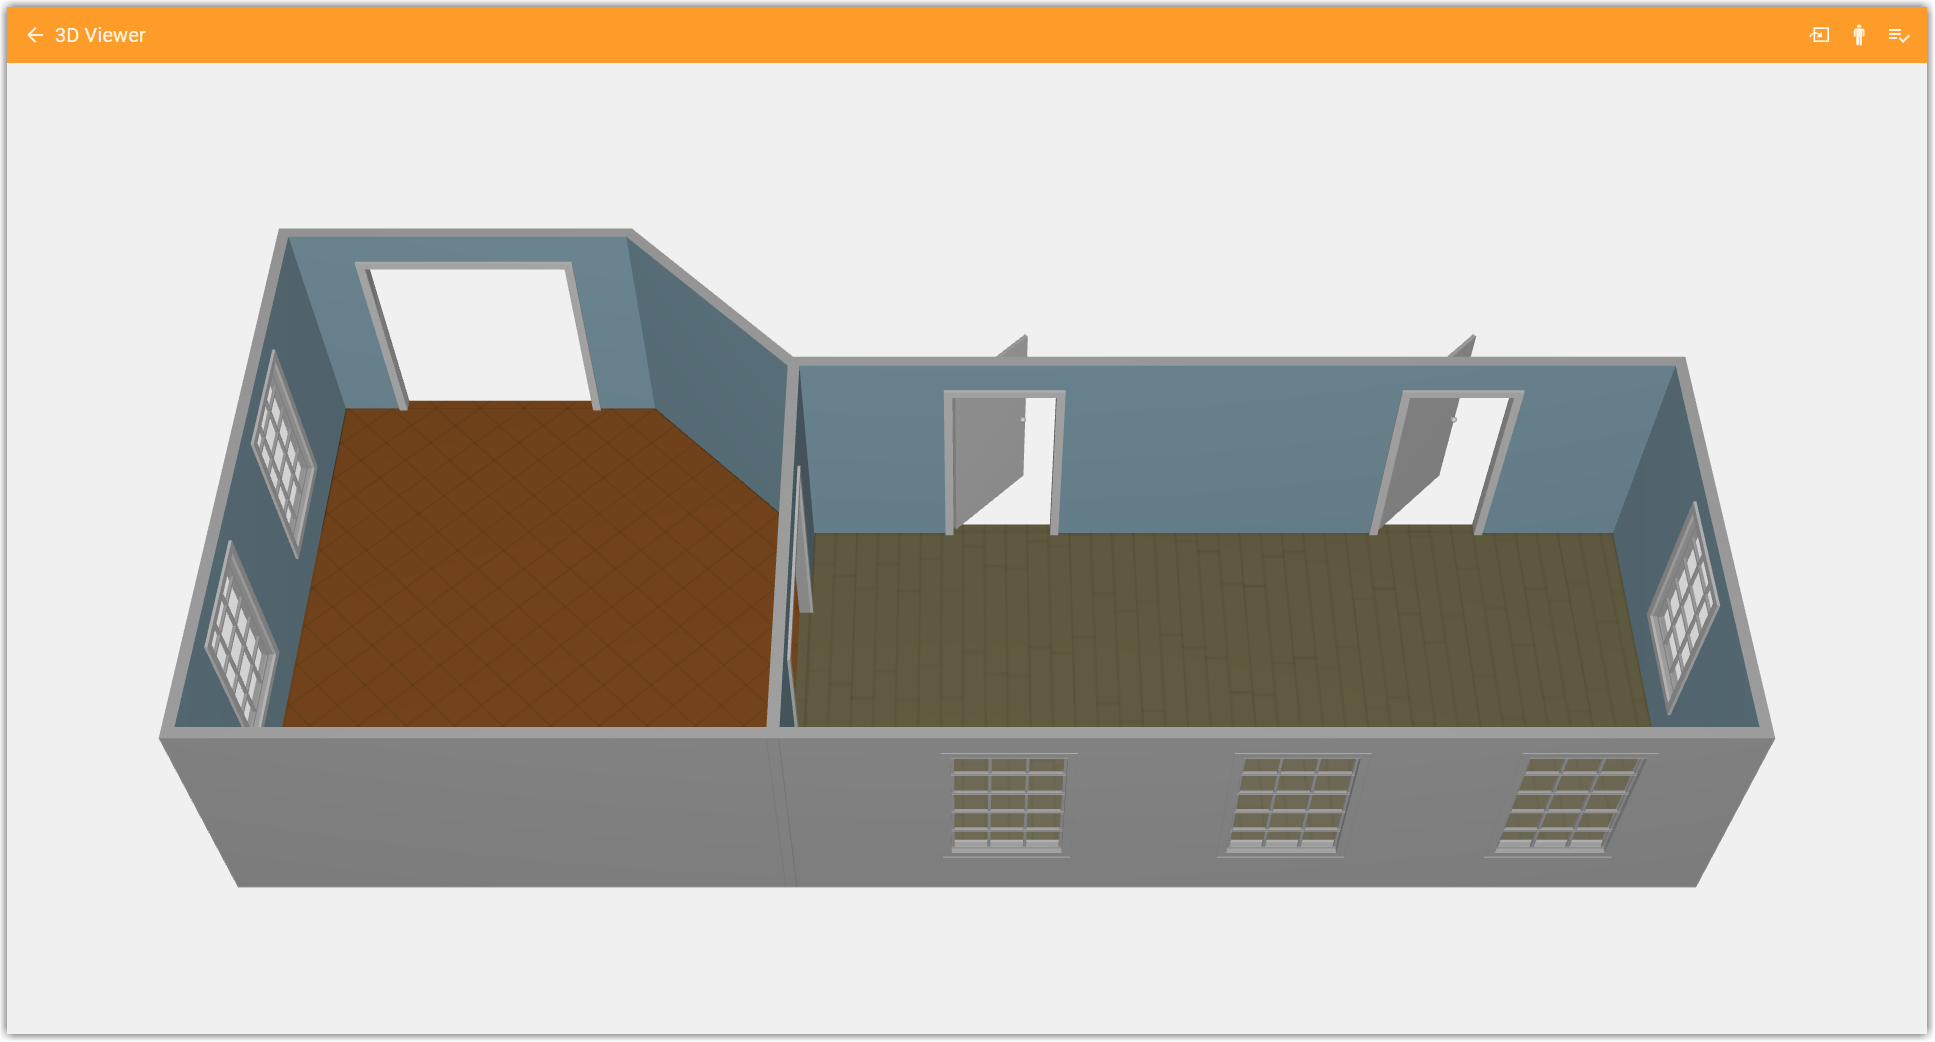
- When in the viewer use the icon in the upper right
 to open the room selector box to change which rooms appear in the viewer.
Printing
When printing your reports, if you choose to include the Room Plan, the 3D view of the room will automatically be added to the report.
Tip: The last position that the 3D image was left in the viewer is what will be displayed on the printout.
Comments
Please sign in to leave a comment.